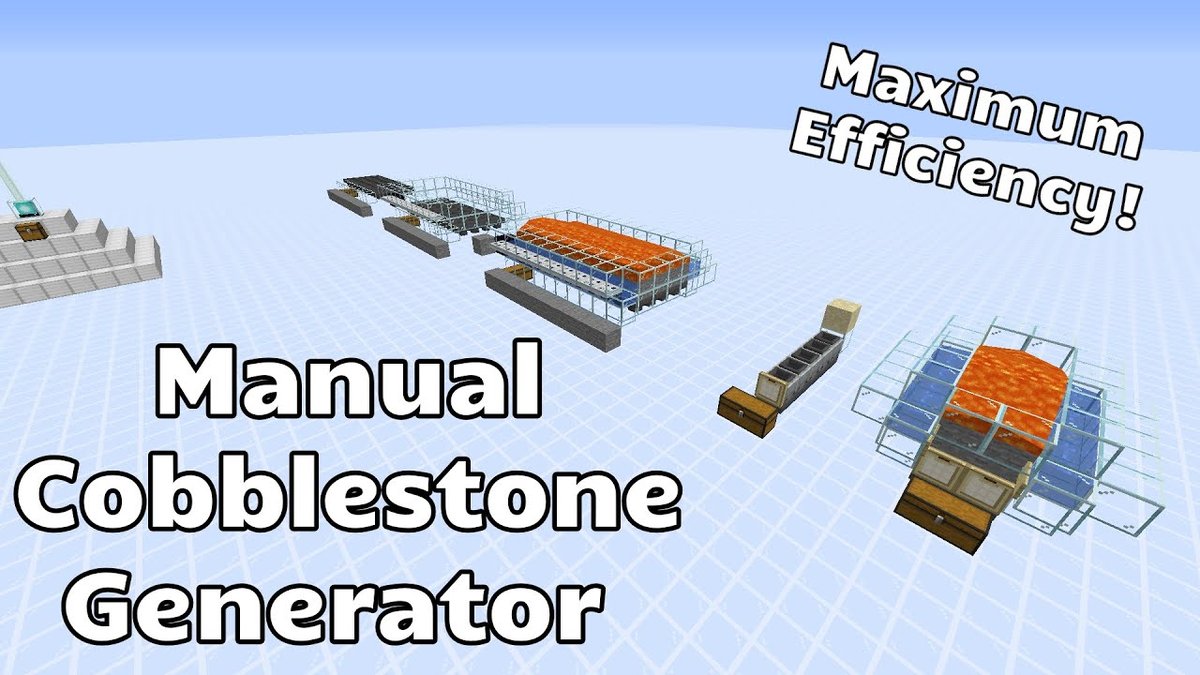
Minecraft players, you know the drill: Whether you're building an epic castle, crafting an intricate redstone contraption, or just trying to expand your humble starter base, cobblestone is your foundational friend. It's renewable, plentiful, and absolutely essential. But endlessly digging by hand? That's for the birds. This is where Compact & Efficient Cobblestone Generator Layouts come into play—the unsung heroes of any robust Minecraft world.
Imagine a machine that endlessly churns out cobblestone, often without you lifting a finger after the initial setup. From a simple hole in the ground to a fully automated behemoth that processes thousands of blocks an hour, learning to build these generators transforms your gameplay from resource scavenging to resource mastery.
At a Glance: Mastering Infinite Cobblestone
- The Magic Formula: Water + Lava = Cobblestone. Understanding this interaction is key.
- Start Simple: Begin with basic, low-resource designs perfect for early game or Skyblock.
- Automate Collection: Upgrade to designs that feed directly into chests, saving inventory space.
- Piston Power: Use pistons to push blocks, making mining easier and opening doors to semi-automation.
- Redstone Mastery: Advanced generators leverage complex redstone, TNT dupers, and hopper clocks for maximum efficiency.
- Safety First: Always use inflammable blocks around lava and build explosion-proof areas for TNT.
- Pickaxe Perks: Choose between Silk Touch (for stone) or Fortune (for more cobblestone) based on your needs.
The Genesis of Cobblestone: How It Works
At its heart, a cobblestone generator exploits a fundamental Minecraft mechanic: the interaction of water and lava. When flowing water meets flowing lava, it reliably produces cobblestone. Different interactions yield different results:
- Flowing Water + Still Lava: This combination creates Obsidian, a valuable but tough-to-mine block.
- Flowing Lava + Still Water: Results in Stone blocks, which can be useful if you're aiming for smooth stone later.
- Flowing Lava + Flowing Water: This is the sweet spot for cobblestone production.
The trick lies in controlling these flows so they always meet in just the right way to produce the block you need, right where you can easily mine it. If you're looking for an in-depth dive into the basics, you'll find plenty of guidance on how to make cobblestone generators. Now, let's explore some layouts, from foundational to mind-blowing.
1. The Bare Essentials: Your First Cobblestone Generator
Every epic base starts somewhere, and often, that's with a handful of resources and a burning need for cobblestone. This simplest design is your entry point, perfect for new worlds, Skyblock challenges, or when resources are scarce. It's not the fastest, but it's incredibly reliable.
Why It's Great:
- Super Easy: Minimal materials, quick to build.
- Accessible: Even new players can construct this with ease.
- Skyblock Savior: Indispensable in resource-limited environments.
What You'll Need: - 1 Water Bucket (or 1 Ice Block)
- 1 Lava Bucket
Building Your First Cobblestone Stream:
- Dig a Trench: Start by digging a simple 4-block long, 1-block wide, and 1-block deep trench in the ground.
- Create a Drop: In that trench, break the second block from one end (let's say the left end) to deepen it by one more block. This creates a small pit.
- Place the Water: Pour your water bucket into the end of the trench closest to the deeper hole (the leftmost end in our example). The water should flow into the pit. If using ice, place it and break it.
- Introduce the Lava: On the opposite end of the trench, two blocks away from the deeper hole, place your lava bucket. The lava will flow and meet the water, instantly creating cobblestone in the space above the deep hole.
- Mine Away! Stand beside the generated cobblestone block and mine it. A new block will instantly form in its place.
This design requires you to actively collect each block, making it less efficient for large-scale projects, but it's your first step towards infinite resources!
2. Upgrading to Collection: The Popular Auto-Collect Design
Once you're tired of manually picking up every single cobblestone block, it's time to upgrade. This popular design integrates hoppers and chests to automatically collect your mined cobblestone, freeing up your inventory and streamlining your resource gathering. It’s a significant leap in convenience and a fantastic mid-game solution.
Why It's Great:
- Automatic Collection: Hoppers funnel blocks directly into chests.
- Efficiency Boost: Focus on mining, not inventory management.
- Scalable: Easy to expand storage with more chests.
What You'll Need: - 2 Water Buckets
- 1 Lava Bucket
- 5 Inflammable Stairs (e.g., stone brick stairs, nether brick stairs)
- Plenty of Inflammable Solid Blocks (e.g., stone, obsidian, netherrack, NOT wood)
- 5 Hoppers
- 2 Chests (for a double chest)
- 1 Sign
Building Your Self-Collecting Source:
- Set Up Storage: Dig a 1x2 hole in the ground and place two chests side-by-side to form a double chest.
- Connect Hoppers: Crouch (shift) and place five hoppers, with one facing directly into the top of the double chest. Connect the remaining four hoppers in a chain, feeding into the first one. All hoppers should direct items towards the chest.
- Contain the System: Surround the hoppers and chests with solid, inflammable blocks. Build this structure one block taller than the hoppers.
- Add Water Channels (Stairs): Place your five inflammable stairs on top of the solid blocks that directly cover the hoppers. Make sure they form a line above the hoppers.
- Build a Second Layer: Place another layer of solid blocks on top of the bottom solid blocks, adjacent to the stairs.
- Place the Sign: On a solid block above the chest (at player head level), place a sign. This will prevent the water from flowing into your mining area.
- Waterlog the Stairs: Carefully waterlog each of the five stairs. This means right-clicking each stair with a water bucket. The water should be contained within the stair blocks.
- Construct Lava Platform: Add more solid blocks above the stairs, other solid blocks, and the sign to create a third layer. This creates a channel for the lava.
- Introduce the Lava: Place a lava bucket one block above the flowing water in the center of your generator. The lava will flow into the water, producing cobblestone directly above the hoppers.
- Mine with Ease: Stand on the chest and mine the continually generated blocks. They'll drop right into your hoppers and chests.
3. Pushing the Limits: The Piston-Based Cobblestone Generator
For those who want a bit more control and a consistent mining point without constant block replacement, piston-based generators are an excellent next step. They automatically push newly generated cobblestone blocks towards you, creating a long line of blocks to mine. While not fully automatic in terms of collection, they significantly improve the mining experience.
Why It's Great:
- Consistent Mining Point: Blocks are pushed to you.
- Reliable: Simple redstone mechanism, less prone to errors.
- Controllable: Easy to start and stop with a lever.
What You'll Need (for one module): - 2 Water Buckets
- 1 Lava Bucket
- 8 Pistons
- 2 Redstone Torches
- 1 Redstone Repeater
- 11 Redstone Dust
- 5 Inflammable Stairs
- Plenty of Inflammable Solid Blocks
- 1 Lever
Building Your Piston-Powered Line:
- Water Containment: Place five inflammable stairs in a row. Surround these stairs with inflammable solid blocks to create a basin. Waterlog the stairs (right-click with water bucket) to contain your water source.
- Lava Basin: Place solid blocks on top of the stairs and along the edges of your water basin. Extend this structure with two more blocks on either end, away from the stairs, then connect these ends with more solid blocks. This forms a ring for your lava.
- First Redstone Torch: On one side of the stair array, break a block diagonally downwards from a stair and place a redstone torch in the newly created hole.
- First Piston: Place a piston diagonally upwards from the redstone torch, ensuring it faces towards the stair area.
- Initial Redstone Power: Place a solid block attached to this piston and one redstone dust next to it.
- The Piston Row: On the opposite side of your water basin from the first piston, place eight pistons in a row. These should be facing towards the center where cobblestone will generate.
- Powering the Row: Place solid blocks behind these eight pistons and lay redstone dust over them.
- Second Redstone Torch: Break a block diagonally downwards from the last of the eight pistons and place a redstone torch in the hole.
- The Redstone Clock: From this second redstone torch, place two more redstone dust, followed by a redstone repeater (facing away from the torch), and then two more redstone dust. Connect this line to the redstone dust behind the row of eight pistons. This creates a simple clock circuit.
- Lava Introduction: Place lava one block above the first piston you placed and in the center of the ring you built earlier. Cobblestone should start generating.
- Activate/Deactivate: Place the lever on the solid block attached to the first piston (the one connected to the initial redstone dust) to activate or deactivate the piston pushing mechanism.
Enhancement: The Fast Cobblestone Generator (AFK Mining)
A variation often seen, sometimes called the "Badlion.net version," focuses on speed by allowing AFK mining. Instead of pushing a long line, it uses two alternating pistons to rapidly push you back and forth across the generation point, effectively bypassing the slow regeneration issue of basic generators. This requires precise timing and player positioning. While detailed steps can vary, the core principle is a rapid redstone clock powering two pistons to create a shaking motion for the player to mine faster. This leverages the game's immediate block generation when space is cleared.
4. The Automated Marvel: Fully Automated with TNT Duper
Now we're entering the realm of serious automation. For players who demand thousands of cobblestone blocks per hour without any manual mining, a fully automated generator with a TNT duper and an Etho hopper clock is the ultimate solution. This is a complex redstone machine, requiring careful construction and a deep understanding of mechanics, but the reward is an unparalleled yield.
Why It's Great:
- Full Automation: 100% AFK once built.
- High Yield: Generates thousands of blocks per hour.
- Scalable Destruction: TNT duper efficiently clears large amounts of generated blocks.
Crucial Warning: This generator can malfunction and delete your lava source if the regular pistons reach their full push limit (12 blocks). Always deactivate the generator with its lever before this happens, or ensure your collection system and TNT duper are working flawlessly.
Given the immense complexity, we'll break this down into its primary components.
4.1. The Cobblestone Production Line
This section focuses on the actual generation and pushing of cobblestone.
Key Materials:
- 5 Regular Pistons
- 5 Leaves (or other inflammable, non-solid blocks)
- Inflammable Solid Blocks
- 1 Lava Bucket
- 1 Water Bucket
- 1 Observer
- 5 Sticky Pistons
- 5 Target Blocks
- Redstone Dust
- 1 Redstone Repeater
- 1 Lever
Building the Generation Core:
- Piston Array: Place five regular pistons facing your planned collection area. Place five leaves on top of each piston (these are non-solid and waterloggable). Waterlog all the leaves.
- Lava Ring: Create a ring of inflammable solid blocks around the leaves, extending one block beyond the leaves on either end. This forms a channel, one block wide, around the leaves, for your lava.
- Observer Power: On one end of the lava ring, one block below and in the center, place an observer looking towards the leaves. Place a solid block behind the observer.
- Sticky Piston Base: Diagonally downwards from the regular pistons, place five sticky pistons facing upwards. Adjacent to these sticky pistons, dig a 5x1 hole and place five target blocks.
- Redstone Power for Sticky Pistons: Next to the target blocks, dig a 6x1 hole (starting from the edge opposite the observer) and place redstone dust along it. Under the solid block attached to the observer, place redstone dust and connect it to the line of dust next to the target blocks.
- Redstone for Regular Pistons: Attach solid blocks to the side of the regular pistons at the back. Place redstone dust on them, extending with two more dust blocks towards the other redstone line (from the target blocks).
- Timing the Push: Connect these two redstone lines with a redstone repeater facing the line behind the regular pistons. Set this repeater to two ticks (right-click it once).
- Generator Control: Place a lever attached to the redstone line before the repeater to disable or enable the cobblestone generation and pushing.
- Add Lava: Finally, add lava to the ring you created. The observer will detect the cobblestone, triggering the pistons.
4.2. The Destructive Force: The TNT Duper
The TNT duper is the heart of automated destruction, allowing you to break thousands of cobblestone blocks with a single piece of TNT.
Key Materials:
- 1 Obsidian Block
- Leaves (for temporary platform and water containment)
- 6 Slime Blocks
- 1 Fence
- 1 Detector Rail
- 1 Minecart
- 1 TNT
- 1 Dead Coral Fan (any dead coral will work)
- 1 Sticky Piston
- 3 Fence Gates
- Water Buckets
Building the TNT Duper:
- Blast Area: Place an obsidian block about 12 blocks away from the center of your regular pistons, and a few blocks down. This is where your TNT will explode. Dig a large, water-filled hole around it to direct items and contain explosions.
- Pillar Up: From the obsidian block, pillar up 15 blocks. This is your anchor point.
- Slime Base (L-shape 1): Diagonally upwards from the top of your pillar, place three slime blocks in an L-shape.
- Fence: Attach a fence to the topmost slime block of your L-shape.
- Slime Base (L-shape 2): Adjacent to the fence (on the opposite side from the first L), place three more slime blocks in an L-shape.
- Rail & Minecart: Place a detector rail on the slime block that is attached to the fence, and put a minecart on top of the rail.
- TNT & Coral: Place a TNT block directly under the fence. Attach a dead coral fan to the slime block that is next to the TNT.
- Duper Piston: Add a sticky piston facing towards the rest of the TNT duper, attached to the slime block next to the detector rail. This piston will push the duper to activate it.
- Leaf Platform (Water Holding): Construct a 5x5 vertical platform of leaves, with its top center block attached to a slime block one block below your sticky piston (from step 8). Create a 2x5 leaf platform attached to the bottom center, and two more leaf blocks on either side. This should resemble an armchair.
- Water Gates: Place three fence gates diagonally upwards from the edge of the "armchair" leaf blocks. These will hold water.
- Water Source: Temporarily replace the leaves in the "armchair" with solid blocks. Place water in the corner of the leaf armchair. Replace the solid blocks with leaves once the water is in place.
- TNT Momentum Stopper: Attach a solid block to the center fence gate to prevent the TNT from being pushed too far forward.
4.3. The Brains: The Etho Hopper Clock
This mechanism provides the precise timing needed to activate the TNT duper.
Key Materials:
- 3 Solid Blocks
- 1 Observer
- 2 Hoppers
- 2 Redstone Comparators
- 2 Redstone Repeaters
- 2 Redstone Dust
- 2 Top-Half Slabs
- 2 Sticky Pistons
- 1 Redstone Block
- 4 Items (any item, for clock timing)
- 1 Lever (for master switch)
Building the Hopper Clock:
- Observer Trigger: Place three solid blocks attached to the TNT duper's sticky piston. Break the two closest to the piston, leaving the third. Place an observer facing into this remaining third block. Remove the third solid block. The observer should now face an empty space next to the sticky piston.
- Hopper Setup: Diagonally downwards from the observer, place two permanent solid blocks. Adjacent to the last of these blocks, place two connected hoppers (one feeding into the other).
- Comparator & Repeater (Side 1): Place two solid blocks diagonally downwards from one of the hoppers. Place a redstone comparator on the block closer to the hopper (reading its contents), and a redstone repeater on the other block.
- Sticky Piston Power (Side 1): Place a solid block attached to the repeater with redstone dust on top. Attach a top-half slab to this dust, add redstone dust to the slab, and attach a sticky piston to the slab, facing the hoppers.
- Repeat for Side 2: Construct an identical setup on the other side of the hoppers.
- Clock Activation: Place a redstone block on top of one of the hoppers. Fill the other hopper with exactly 4 items (e.g., dirt, cobble). This will cause the items to cycle, activating the clock.
- Observer Connection: Add two redstone dust blocks between the observer and the hopper clock, connecting them.
- Master Switch: Power the redstone dust that the observer faces (with a lever or a master switch for the entire machine) to disable the clock and duper when not in use.
- Final Block: Place the final solid block between the observer and the sticky piston that the observer activates.
4.4. The Cleanup Crew: The Collection System
After all that destruction, you need a robust way to gather your precious cobblestone.
Key Materials:
- Obsidian (for walls)
- Water Buckets
- Hoppers
- Chests
- 1 Stair
Building the Collection System:
- Blast Chamber: Underneath your obsidian blast block (from the TNT duper), create an 11x11 platform. Surround this platform with a two-block tall obsidian wall to contain any stray explosions and guide items.
- Water Channels (Side 1): Along the bottom side of this 11x11 platform (closest to your main generator), place a 2-block wide, 11-block long platform. Place water along the obsidian wall on this side. The water should flow into the center.
- Water Channels (Side 2): Dig a one-block deep hole along the edge before the water stops flowing. Place a water source on the end opposite where your chests will be. This creates a current.
- Item Stream: Extend the hole by digging one block deep, one block before the water stops flowing (this helps funnel items).
- Hopper & Chest: At the very end of this extended channel, place a hopper facing into a chest. Place a stair above the chest. This allows you to open the chest while also preventing items from bouncing out.
- Expand Storage: Chain as many hoppers and chests as needed to handle the immense yield of this machine. For truly high yield, consider multiple chest arrays.
This fully automated generator transforms resource gathering into an AFK endeavor, letting you focus on other projects while your cobblestone stockpile grows exponentially.
Choosing Your Ideal Cobblestone Generator
With several designs available, how do you pick the right one? Consider these factors:
- Resource Availability: Early game with few resources? The Simple or Popular designs are best. Later, with farms for redstone components, the automated versions become viable.
- Automation Level Desired:
- Manual: Simple, no collection.
- Semi-Manual: Popular (collection), Piston-Based (pushing).
- Fully AFK: Fully Automated (TNT Duper).
- Yield Requirements: How much cobblestone do you really need?
- Low: Simple.
- Medium: Popular, Piston-Based.
- High (Thousands/Hour): Fully Automated.
- Redstone Comfort Level: Are you a redstone novice or a seasoned engineer? Start simple and gradually tackle more complex designs.
- Space & Aesthetics: Compact designs save space. Some players prefer integrating generators seamlessly into their bases.
Mastering Your Cobblestone Farm: Essential Tips & Tricks
Building a generator is one thing; optimizing and maintaining it is another.
- Pickaxe Power:
- Fortune: Use a pickaxe enchanted with Fortune III to get significantly more cobblestone per block mined from any generator.
- Silk Touch: If you need regular Stone blocks (to smelt into smooth stone or for building), use a Silk Touch pickaxe. The generated block will be Stone, not Cobblestone.
- Inflammable Blocks are Your Friends: Always use blocks like stone, obsidian, netherrack, or even certain modded blocks around lava. Wood, wool, and many other common building blocks will catch fire!
- Redstone Troubleshooting: If your piston or automated systems aren't working, double-check:
- Power: Is every redstone dust, repeater, and piston receiving power?
- Direction: Are observers, pistons, and hoppers facing the correct direction?
- Delay: Are repeaters set to the right tick delays?
- Block Placement: Is every block in its exact specified location? A single misplaced block can break a complex circuit.
- Containment is Key (Especially for TNT): If using a TNT duper, build a robust explosion-proof chamber using obsidian. Waterlogging the floor of the collection area also significantly reduces explosion damage and directs items towards hoppers.
- Chunk Loading: For fully automated designs, ensure the generator is within a loaded chunk if you want it to run while you're away from the immediate area. On servers, this might require specific chunk loaders.
- Light Up Your Farm: Prevent hostile mob spawns around your generator, especially in the collection area, by placing plenty of torches or other light sources.
Beyond the Basics: Pushing Efficiency Further
While the designs covered here are powerful, the world of Minecraft redstone is always evolving. You might encounter designs that:
- Use different TNT duper variations: More compact or robust designs.
- Leverage new blocks: Observers, target blocks, and even newer additions like sculk sensors can change generator efficiency.
- Integrate into larger systems: Automated sorting, storage, and even crafting systems.
Always be on the lookout for new innovations from the vibrant Minecraft community. Tutorials from popular redstone YouTubers are an excellent resource for cutting-edge designs and troubleshooting tips.
Your Path to Infinite Cobble
No matter your playstyle or experience level, a cobblestone generator is an invaluable asset in Minecraft. From the humble beginnings of a simple water-and-lava hole to the majestic roar of a fully automated TNT-powered factory, these compact and efficient layouts empower you to build, create, and explore without ever worrying about running out of this fundamental resource. So, gather your buckets, ready your pickaxes, and embark on your journey to infinite cobblestone!